How to share access to your remote production studio + Roles (Admin, Producer, Viewer)
Remote Production Software
- 10 May, 2024
- 554 Views
- 0 Comment
Adding a video source to your Hive setup is straightforward and offers a range of options to suit various broadcasting needs. Hive is capable of connecting to IP video sources like NDI, ONVIF, or RTSP, which need to be on the local area network or Hive-Linked cameras that can be located anywhere globally. Additionally, USB cameras can be integrated into your setup provided they are connected directly to the computer running Hive.
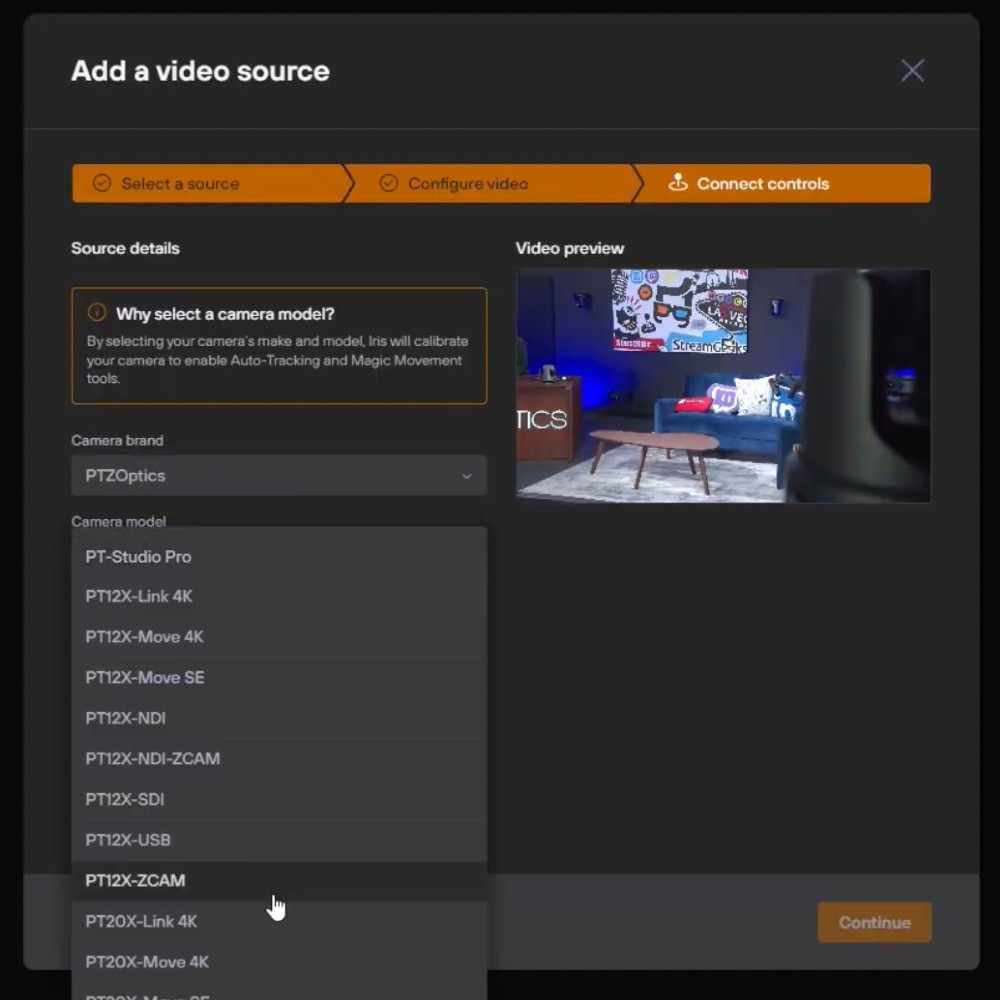
To add a camera, simply log into your Hive account and click the Plus button to bring cameras into your studio. Hive features an auto-discovery tool that lists all the available cameras on your network, making it easy to select your desired video source. Once selected, you’ll immediately see a video preview.
At this stage, you can pick a camera driver, which is crucial for unlocking advanced features such as editing image settings and operating remote PTZ controls. After connecting, you’ll have the ability to monitor each video source closely. This includes viewing the connection status to the cloud, checking the bitrate, and making necessary adjustments to the stream to ensure optimal broadcast quality.
By following these steps, you can efficiently integrate and manage video sources in Hive, enhancing your production capabilities with flexibility and high control over your broadcasts.

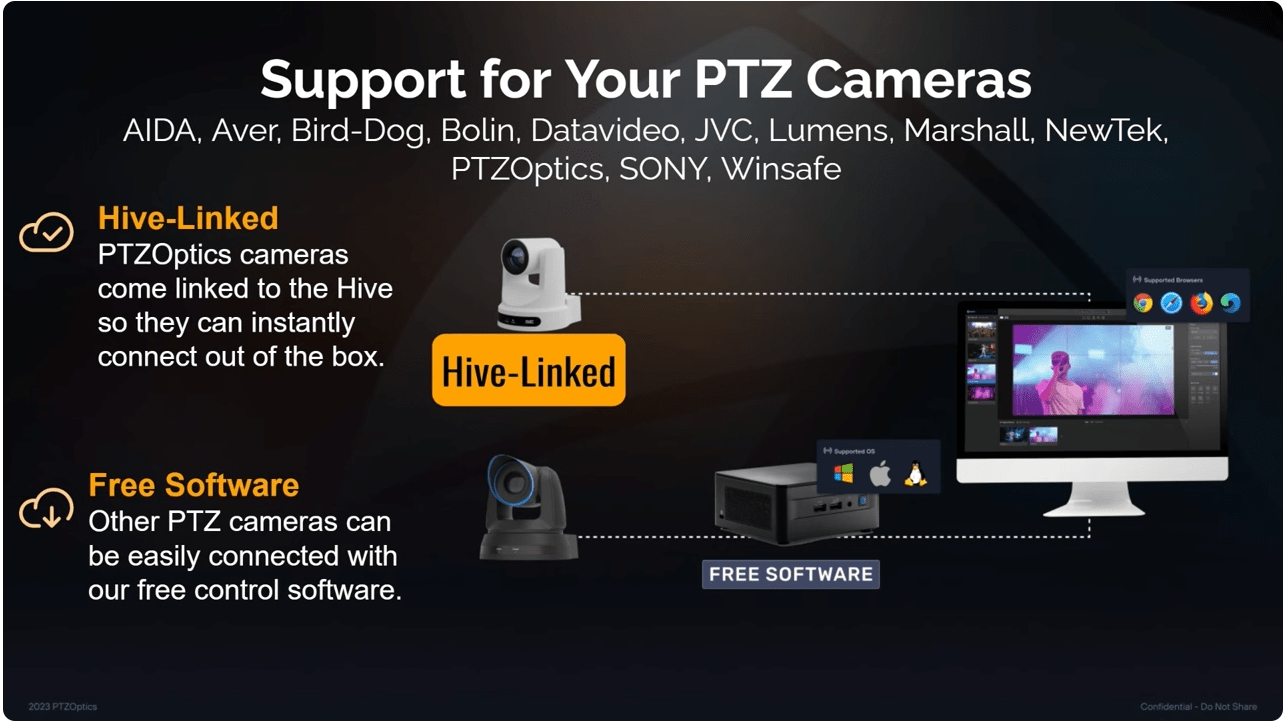
The image above shows how you can add Hive-Linked PTZ cameras directly to Hive without the need of a computer. This is currently only available with PTZOptics Move SE and Move 4K cameras. This is ideal for many scenarios where you do not want to use computers as connection points in to the cloud.
Adding IP Video Sources Hive supports multiple IP-based video protocols such as NDI, ONVIF, and RTSP. To incorporate an IP video source, it must be connected to your local area network. Hive’s sophisticated system can also connect to Hive-Linked cameras, which can be located anywhere in the world, offering tremendous flexibility for remote productions.
- Connect the IP Video Source: Ensure your IP camera or Hive-Linked camera is properly set up and connected to the network.
- Log into Hive: Access your Hive account and navigate to the studio interface.
- Discover and Add Cameras: Click the ‘Plus’ button within the Hive interface. Hive will automatically detect and display all compatible video sources connected to your network. Select the camera you want to add from the auto-discovered list.
- Preview the Video: After selecting a camera, Hive provides a live video preview, allowing you to confirm the feed before full integration.
Adding USB Cameras For productions that require closer proximity to the computer or for those who prefer USB cameras, Hive accommodates this need as well.
- Connect Your USB Camera: Attach your USB camera directly to the computer running Hive.
- Log into Hive and Add the Camera: Similar to IP cameras, you can add your USB camera by clicking the ‘Plus’ button. Since the camera is connected directly, Hive will recognize it immediately.
- Select and Preview: Choose your USB camera from the list, and you’ll get a real-time video preview.
Configuring Camera Settings Once your camera is added, you’ll need to select a camera driver. This step is crucial as it unlocks additional functionalities:
- Image Settings: Modify brightness, contrast, saturation, and other image parameters to enhance video quality.
- Remote PTZ Controls: If your camera supports Pan-Tilt-Zoom (PTZ), Hive allows you to control these functions remotely, providing flexibility in camera angles and movements.
Monitoring and Adjustments After successfully adding and configuring your camera, Hive enables you to monitor each video source comprehensively.
- Connection Status: Check the real-time status of your connection to the cloud.
- Bitrate Monitoring: Monitor the streaming bitrate to ensure your broadcast is smooth without lags or buffering.
- Stream Adjustments: Make real-time adjustments to the stream’s settings directly from the Hive interface to match your production requirements.
Conclusion Integrating a video source into your Hive setup is not just about adding a camera; it’s about enhancing your production’s overall quality and flexibility. Whether you’re broadcasting a live sports event, a concert, or a corporate seminar, understanding how to effectively manage your video sources in Hive can transform your remote production experience, making it more dynamic and engaging for your audience.